The Door in the side of my Boat
Aug 1st 2017
I have been working rather erratically on the boat since
this spring. I had great plans that the progress would be much further along by
now, but thing get in the way, and I am the only one working on this project,
and it is my recreation, so I try not to get stressed about it. Anyways, I
mentioned to Dave Zeiger, the designer of the Triloboats, that the installation
of the door (in nautical terms I think it would be called a hatch) had taken longer to design, partially due to
a lack of suitable examples on the web to copy. So I decided to post some
pictures, despite the unfinished state of things.

The reasons for a door is ease of access since the gunnels (the sides) are
5'4" off the bottom, and this boat is designed to be used either from a
trailer like a very funky R.V., or dried out on a beach, and even when floating
in the water.
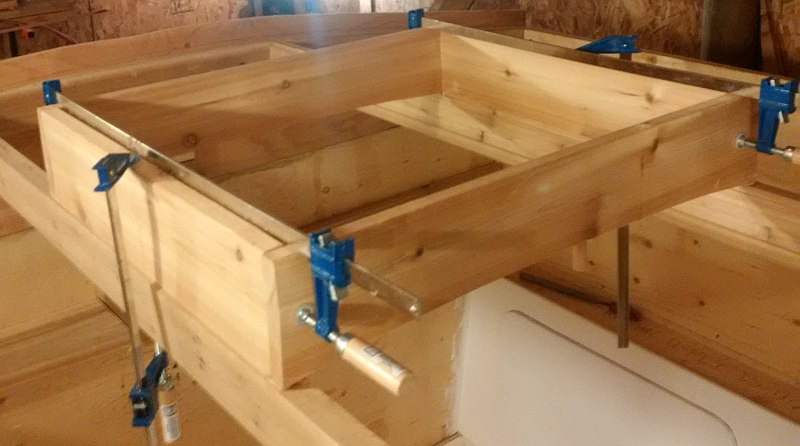
I originally was going to have a U shaped hole in the side,
but was worried that it would cost too much strength, so changed to a hatch
design. There is a vertical 2x6 topped by another 2x6 in a tee shape that runs the length of the boat. Glued inboard of the horizontal piece is a 2x4 the length of the cockpit to strengthen the opening and provides a nice place to sit on top of the gunnel. There will be door, opening outward, with the hinges on the forward
side. The door will be slightly larger than the opening, with scuppers in the
lower edge.
 The area immediately inside the door is sealed off, other
than the self draining well just aft of it, which will hold the aft anchor. The
plan is that any water that does get in here will flow harmlessly out.
The area immediately inside the door is sealed off, other
than the self draining well just aft of it, which will hold the aft anchor. The
plan is that any water that does get in here will flow harmlessly out.
Dimensions of the opening are 18 inches wide by 44 inches
tall, but might increase to 46 or so, so that I can put some nice curves at the
top of the opening.
The distance from the door to the windows in the saloon is 11 feet, so
there is room to store a retracted lee board with out blocking the door or
window.


There is 32 inches to the transom, allowing an as yet unbuilt bench seat with leanbacks to be installed across the transom. A folding floor hatch will cover the door well when sailing so that I don't fall in it on a bad tack.
The doubler plate (Green 3/4 ply piece) is 24 inches, and the door is cut 6 inches
into it, so the bottom of the door well is 18 inches above the bottom of the
boat, or 6 inches above the design water line.
 Here is a view of the seat and leanback forward of the door, this is typical of the other seats around the cockpit. This one has a small propane locker on the forward edge, to hold the 20lb bottle that will feed the camp stove inside. It will have a gravity vent so that any leaking propane will go overboard and not into the main cabin. The other compartment or lazarette has a false bottom, so I can empty it and climb down beside the engine if required to service it. I have not built the seat hatches yet, but in the final picture you can see some pieces of ply that will become the seat and back sitting in place.